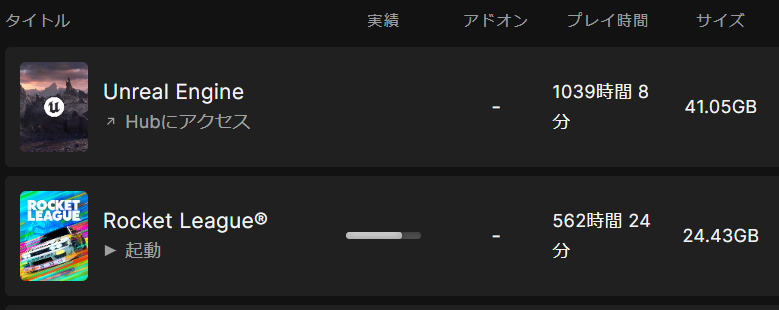
7/27 最近UEもロケリも触ってない

Arduino Nano 33 BLE Senseでも動作するI2Cセンサのプログラムをまとめます。
I2Cスキャン
I2Cで接続されているセンサ類のI2Cアドレスをすべて検出します。センサが使えるかどうかのチェック用です。
クリックでコードを表示
#include <Wire.h>
void setup()
{
Wire.begin();
Serial.begin(9600);
while (!Serial);
Serial.println("\nI2C Scanner");
}
void loop()
{
byte error, address;
int nDevices;
Serial.println("Scanning...");
nDevices = 0;
for(address = 1; address < 127; address++ )
{
Wire.beginTransmission(address);
error = Wire.endTransmission();
if (error == 0)
{
Serial.print("I2C device found at address 0x");
if (address<16)
Serial.print("0");
Serial.print(address,HEX);
Serial.println(" !");
nDevices++;
}
else if (error==4)
{
Serial.print("Unknown error at address 0x");
if (address<16)
Serial.print("0");
Serial.println(address,HEX);
}
}
if (nDevices == 0)
Serial.println("No I2C devices found\n");
else
Serial.println("done\n");
delay(5000);
}
SHT35 (高精度温湿度センサ)
コマンドを送信することで16進数の値が返ってきます。(温度2byte+チェックサム1byte+湿度2byte+チェックサム1byte) あとはいい感じに計算します。
クリックでコードを表示
#include <Wire.h>
#define SHT35_ADDRESS 0x45
#define SHT35_MEASURE_CMD_MSB 0x24
#define SHT35_MEASURE_CMD_LSB 0x0B
void setup() {
Wire.begin();
Serial.begin(9600);
}
void loop() {
Wire.beginTransmission(SHT35_ADDRESS);
Wire.write(SHT35_MEASURE_CMD_MSB);
Wire.write(SHT35_MEASURE_CMD_LSB);
Wire.endTransmission();
delay(15);
Wire.requestFrom(SHT35_ADDRESS, 6);
byte data[6];
for (int i = 0; i < 6; i++) {
data[i] = Wire.read();
}
unsigned int rawTemp = (data[0] << 8) | data[1];
unsigned int rawHum = (data[3] << 8) | data[4];
float temp = -45 + 175 * ((float)rawTemp / 65535);
float hum = 100 * ((float)rawHum / 65535);
Serial.print("Temperature: ");
Serial.print(temp);
Serial.println(" °C");
Serial.print("Humidity: ");
Serial.print(hum);
Serial.println(" %");
delay(1000);
}
VEML7700(照度センサ)
このセンサはAdafruitのやつですが、DFRobotのライブラリなら動きました。有名なセンサだといっぱいライブラリあっていいですね。
クリックでコードを表示
#include "DFRobot_VEML7700.h"
#include <Wire.h>
DFRobot_VEML7700 als;
void setup()
{
Serial.begin(9600);
als.begin();
}
void loop()
{
float lux;
als.getALSLux(lux);
Serial.print("Lux:");
Serial.print(lux);
Serial.println(" lx");
delay(200);
}
KP-VL53L0X(ToF式距離センサ)
このセンサは説明書にある「VL53L0X by Pololu」というライブラリでは動作せず、「VL53L0X by Adafruit」は動きました。そのスケッチ例を使えばOKです。
クリックでコードを表示
#include <Wire.h>
#include <Adafruit_VL53L0X.h>
Adafruit_VL53L0X lox = Adafruit_VL53L0X();
void setup() {
Serial.begin(115200);
if (!lox.begin()) {
Serial.println(F("Failed to boot VL53L0X"));
while(1);
}
}
void loop() {
VL53L0X_RangingMeasurementData_t measure;
lox.rangingTest(&measure, false);
if (measure.RangeStatus != 4) {
Serial.print("Distance (mm): "); Serial.println(measure.RangeMilliMeter);
} else {
Serial.println("Out of range");
}
delay(100);
}
BlinkM(RGB制御LED)
キャラクタリスティックを3つ(R,G,B)用意して、それぞれの値を0x00~0xFF(0~255)の範囲で送信して変えることができるプログラムです。
クリックでコードを表示
#include <ArduinoBLE.h>
#include <Wire.h>
#define BLINKM_ADDRESS 0x09
BLEService rgbService("19B10000-E8F2-537E-4F6C-D104768A1214");
BLEUnsignedCharCharacteristic redCharacteristic("19B10001-E8F2-537E-4F6C-D104768A1214", BLERead | BLEWrite);
BLEUnsignedCharCharacteristic greenCharacteristic("19B10002-E8F2-537E-4F6C-D104768A1214", BLERead | BLEWrite);
BLEUnsignedCharCharacteristic blueCharacteristic("19B10003-E8F2-537E-4F6C-D104768A1214", BLERead | BLEWrite);
void setup() {
Serial.begin(9600);
while (!Serial);
Wire.begin();
if (!BLE.begin()) {
Serial.println("starting BLE failed!");
while (1);
}
BLE.setLocalName("RGB Controller");
BLE.setAdvertisedService(rgbService);
rgbService.addCharacteristic(redCharacteristic);
rgbService.addCharacteristic(greenCharacteristic);
rgbService.addCharacteristic(blueCharacteristic);
BLE.addService(rgbService);
redCharacteristic.setValue(0);
greenCharacteristic.setValue(0);
blueCharacteristic.setValue(0);
BLE.advertise();
Serial.println("Bluetooth device active, waiting for connections...");
//色勝手に変わるやつを止める
Wire.beginTransmission(BLINKM_ADDRESS);
Wire.write('o');
Wire.endTransmission();
}
void loop() {
BLEDevice central = BLE.central();
if (central) {
Serial.print("Connected to central: ");
Serial.println(central.address());
while (central.connected()) {
if (redCharacteristic.written() || greenCharacteristic.written() || blueCharacteristic.written()) {
setBlinkMColor(redCharacteristic.value(), greenCharacteristic.value(), blueCharacteristic.value());
}
}
Serial.print("Disconnected from central: ");
Serial.println(central.address());
}
}
void setBlinkMColor(uint8_t red, uint8_t green, uint8_t blue) {
Wire.beginTransmission(BLINKM_ADDRESS);
Wire.write('n');
Wire.write(red);
Wire.write(green);
Wire.write(blue);
Wire.endTransmission();
}
夏休み中やるべきこと
今日は夏休み前最後の研究室だったので、あとは家でやるしかありません。
カラーセンサと3Dプリンター、ポゴピンなど届いていると思うので、研究室からはんだごてやセンサ類諸々持ち帰ってやりたいと思います。
以下やるべきこと
・UEでこれらのセンサの値を読み取る
・キャラクタリスティックを2個読めるのかテスト
・センサ付替え時になんのセンサが付いているか検知する
・ジャイロセンサからカメラ制御してみる
・コントローラを振り上げたときにジャンプできるようにする
・ポゴピンを使って統一規格にし、センサモジュールを作る
・電池駆動のコントローラを設計する
・オリジナルコントローラを使ったゲームを開発する
・信号処理のレポートをやる
・英語のレポートをやる
・数学のレポートをやる
・アパート見に行く
多いなぁ
